Provincial Plank™ Installation instructions
 Pre-Inspection
Provincial Plank™ must be inspected for quality prior to installation.
Please address all issues prior to installation.
If you suspect anything is incorrect with your product, DO NOT install.
INSTALLATION IMPLIES ACCEPTANCE.
Provincial Plank™ is to be used for interior applications only
Acclimatization:
Place Provincial Plank™ in the room where you plan to install. Allow 7 to 10 days for the wood to acclimatize. This is important – the wood needs to expand or contract based on the space’s relative humidity. Failure to do so may cause gaps to appear in the seams or lifting of the boards due to expansion once installed.
After installation, Provincial Plank™ will expand and contract slightly. This is normal and should be expected – this is a natural product and so is not considered a manufacturer’s defect.
Safety
Always wear proper safety glasses, hearing protection, dust mask and gloves when cutting or installing Provincial Plank™. Follow the proper safety procedures highlighted by the tool manufacturers.
Tools Needed:
- Measuring Tape & Pencil
- Mitre Saw
- Level
- Chalk Line
- Hammer/Nail Gun
- 1” Pin Nails
- Caulking Gun
- Construction Adhesive – approx. 1 tube per carton of Provincial Plank™
- Paint
- Roller, Brush & Tray
- Ladder
Helpful Hints
Install only one box at a time. Use all the pieces in this box before opening another. This will force you to use all the colours before moving on – and avoid the situation at then of the install of having enough pieces to finish, but only to find out they are all the same colour.
 Prior to placing the planks, consider the texture and colour of adjacent planks. Keep things varied by avoiding two of the same nearby.
For outside corners and trim consider using Provincial Plank™ pieces. Use them as their full width, or rip them to a narrower size as you see fit. Perhaps install these first to act as a border.
For adhesive, any construction adhesive will work but we recommend PL Premium. Adhesive tape (double sided tape) should never be used.
A hammer and nails will work, but an air nail gun is much easier and faster.
STEP ONE – Measuring:
Measure the length and height in inches of your wall space. Multiply together and divide by 144. This will give you the square footage you need to cover. Add 5 to 10% for waste and off-cuts. Each carton of Provincial Plank™ covers 10 sqft.
STEP TWO – Wall Preparation
Remove any nails or other protrusions that may interfere with the proper laying of planks, including outlet covers. Clean the wall with TSP and rinse. Apply a coat of dark paint to offset any gaps that may appear between the planks. Ensure the paint is fully cured before starting plank installation.
STEP THREE – Decide on a Pattern
The choice is yours, and if you like it, you cannot be wrong. Here are some suggestions…
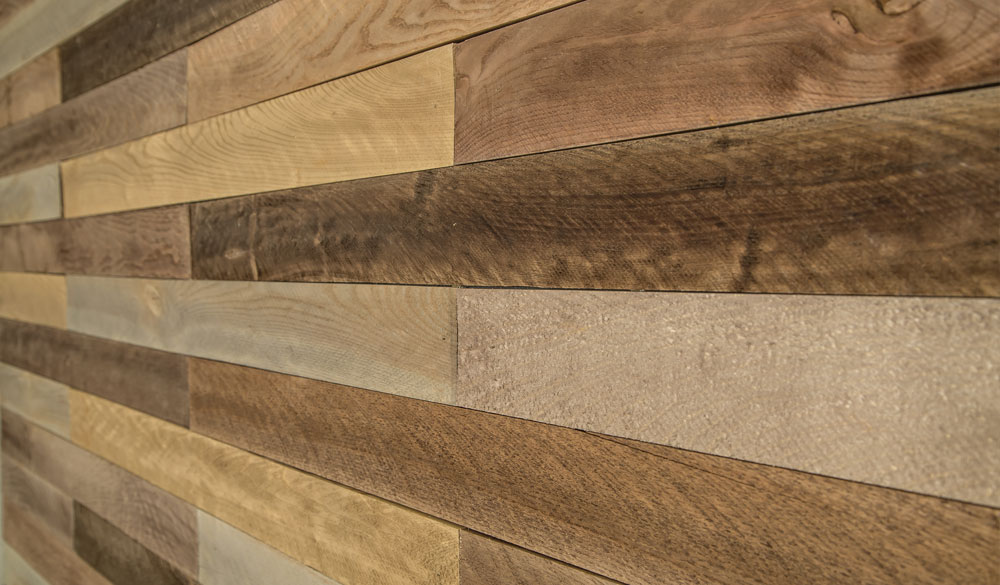
Staggered
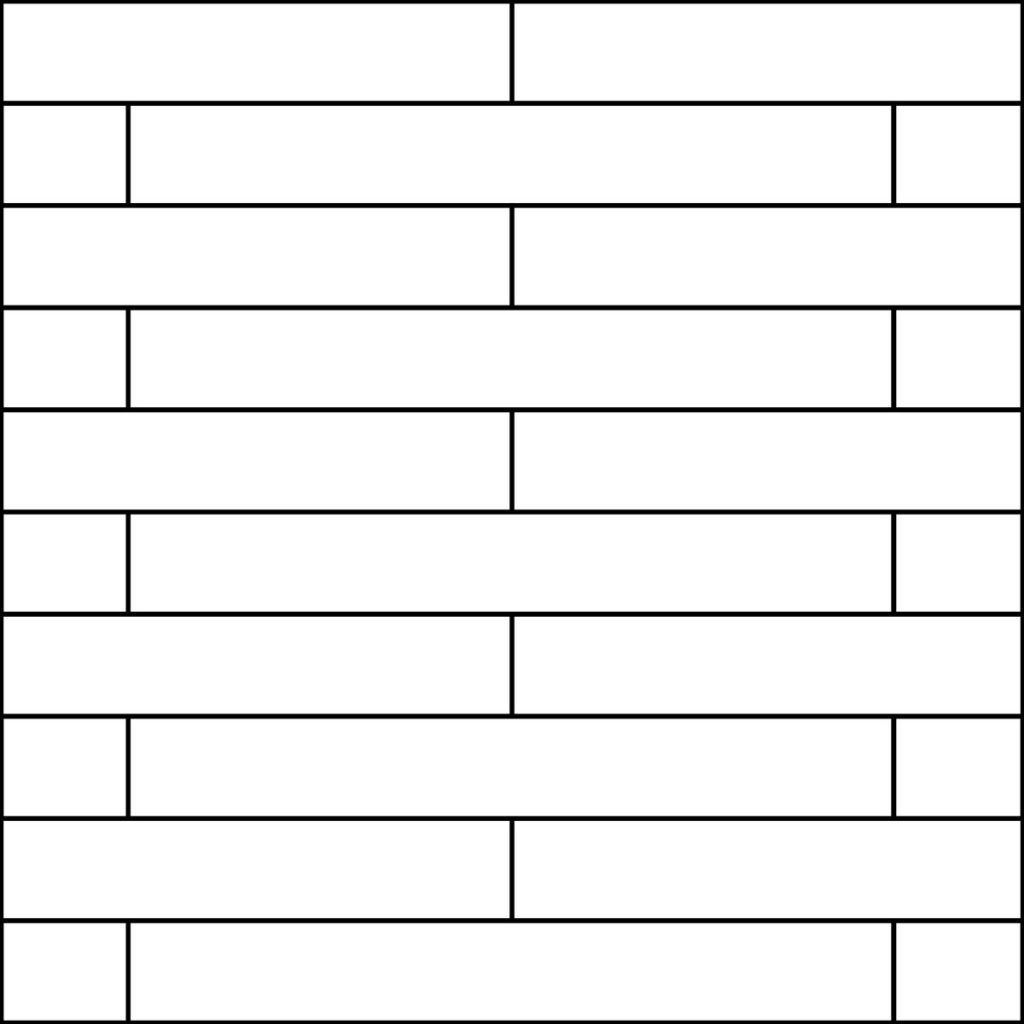
Offset Staggered
Herringbone

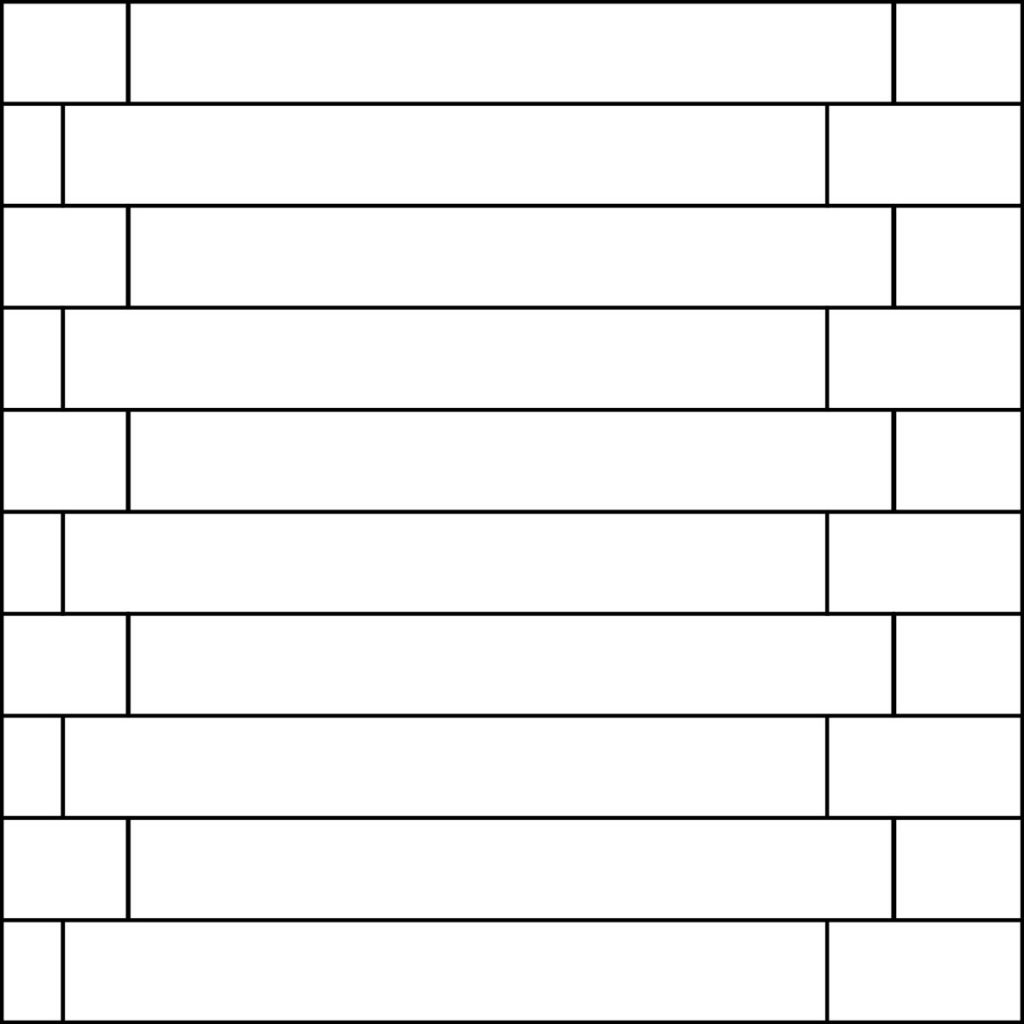
Diagonal
Random
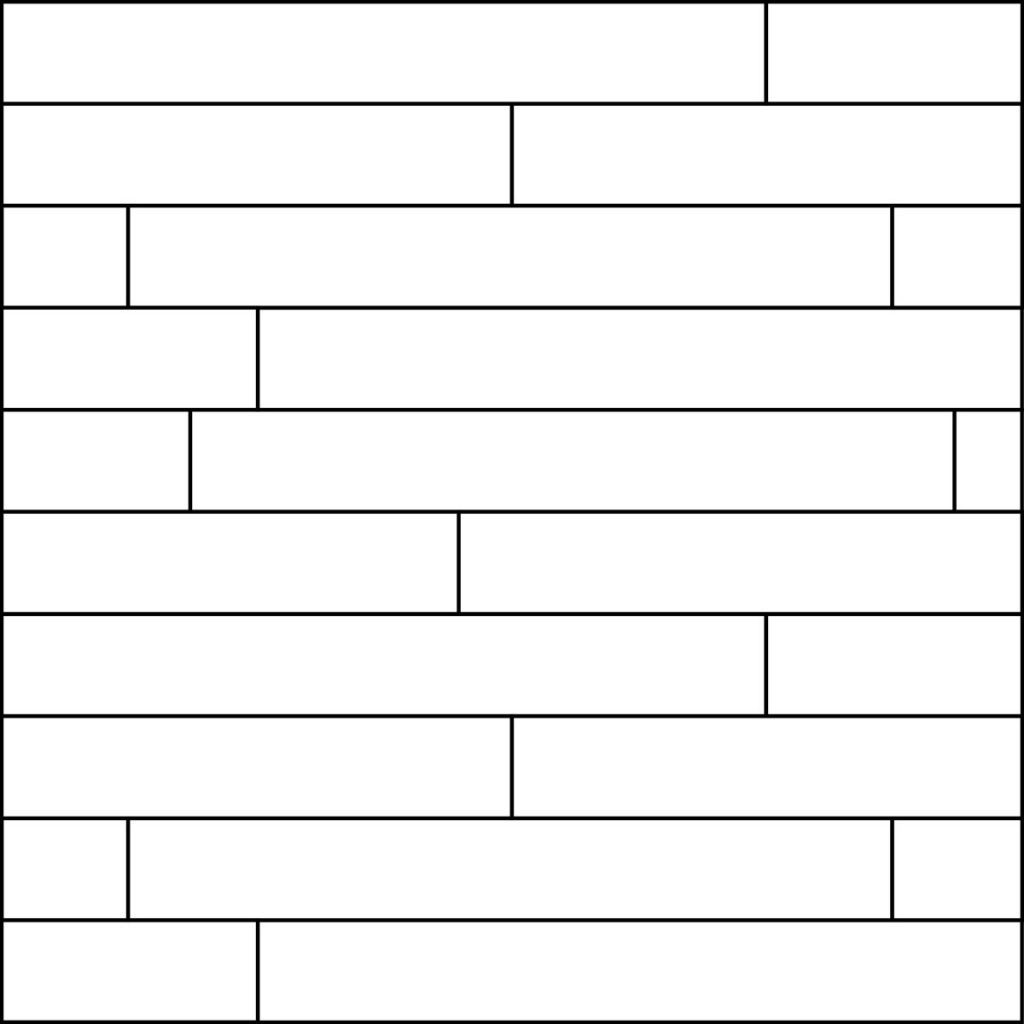
Random will work well in a smaller space, perhaps under 6’ wide. Simply start off with your first piece and continue until you must cut the last piece in the row to fit. Keep this off-cut as it will be a starter piece for another row later.With the next row, cut the piece you want to install randomly so that the seam does not line up over the piece below. If you carry on this way, the seams will appear randomly throughout the wall.
STEP FOUR – Starter Row
If you’re installing horizontal, start at the floor. Ensure your first row is level. If you’re installing Herringbone or Diagonal, snap a chalk line in the middle of the wall at the angle the pieces are to be installed. Then install the pieces with reference to this line.
STEP FIVE – How to Fasten Planks to Wall
Apply in a ‘S’ pattern a generous bead of construction adhesive to the back of each plank using the caulking gun. Place the plank on the wall and wiggle it slightly to spread out the glue. Then pin nail the plank a few times. The pin nails are only meant to hold the piece in place until the glue sets in about 24 hours. Shoot the nails on a diagonal to help the temporary hold.
If the piece has been measured and cut, dry fit to ensure your cut is accurate before applying the glue.
If you’ve cut a piece and the end cut is exposed, purchase a similar colour stain (ie MinWax) to dab on the end. If the end cut cannot be seen, no stain is required.
Check for level as you progress up the wall (or parallel if diagonal) and adjust accordingly. About 2/3 up the wall, measure to the ceiling. You may find even if you’re level, the distance at one end may be different than the other. This will allow you ample time to make slight adjustments so that your last piece is parallel with the ceiling.
Contact us for more info or to order your plank walls…